This quick guide shows the necessary configuration steps to bridge Google Earth Pro into Virtual Reality Head Mounted Displays, compatible to SteamVR or OpenXR, like: Meta Quest 1, 2 & 3, HTC Vive (Pro2), Varjo, Pico and Windows Mixed Reality HMDs. The guide also applies for bridging Google Earth for Powerwalls, 3D stereo projectors, CAVE and DOME.
Guide to bridge Google Earth Pro into Virtual Reality:
- Start Google Earth Pro and open the options
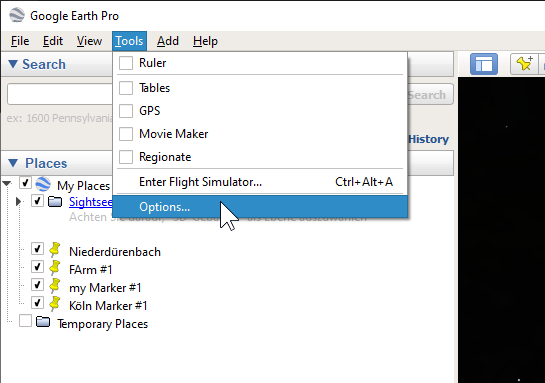
- Set the “Graphics Mode” to “OpenGL” and disable both “Use high quality terrain” and “Use 3D Imagery”

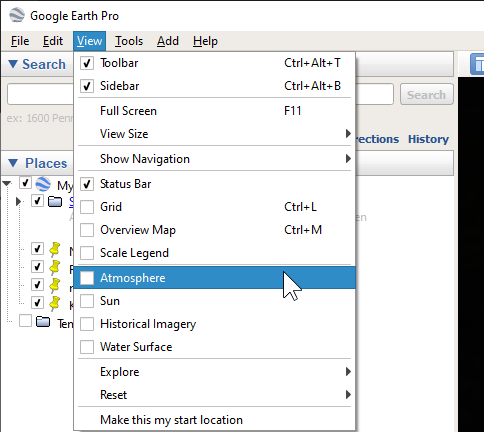
- Lastly, disable “Atmosphere” under “View”
- Close Google Earth Pro.
- Start the moreViz Launcher

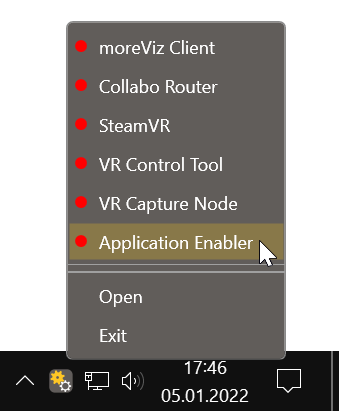
- Notice the moreViz-Tray icon (next to system time) and right-click it, select “moreViz Application Enabler”
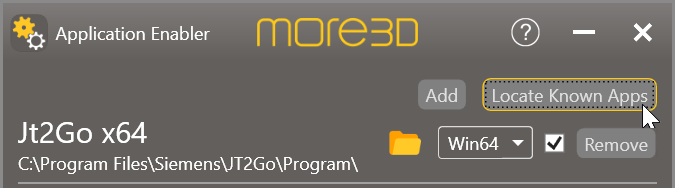
- Click “Locate known Apps”. The more3D application enabler will search the standard program files folders for known Google Earth Pro installations and add them to the list.
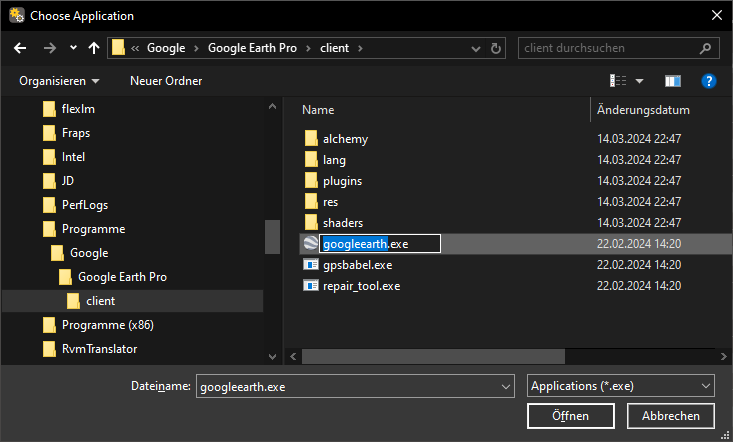
- If Google Earth Pro is installed to a non standard directory, please click “Add”, locate the “googleearth.exe” file. The standard path is:
“C:\Program Files\Google\Google Earth Pro\client\googleearth.exe”
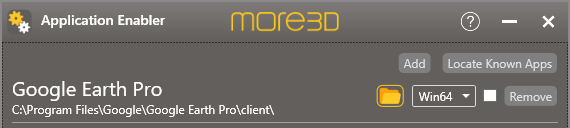
- If you had to manually add the Google Earth Pro to the Application Enabler, then click the folder button in the Google Earth line of the Application Enabler. If your Google Earth Pro installation was auto-detected, then skip this step.
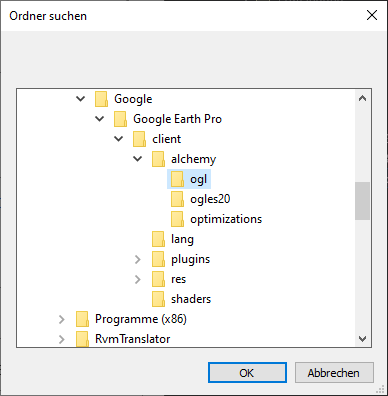
- Browse to the subdirectory Google\Google Earth Pro\client\alchemy\ogl and click OK.
- Click the Enable button right next to the newly created entry.
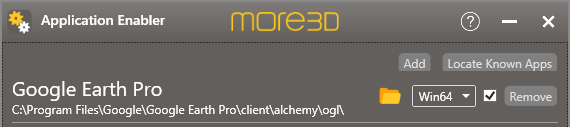
- Close the Application Enabler.
- Start the moreViz Client.
- Start Google Earth Pro.