This page provides guidance on using the moreViz Capture Node, a valuable tool for preparing VR sessions when the host application’s license is unavailable. Additionally, it aids more3D in troubleshooting visualization errors. The Capture Node records all graphics calls from the host application to the GPU, saving them to disk. This data can be replayed later, even after being sent via email.
To record a session:
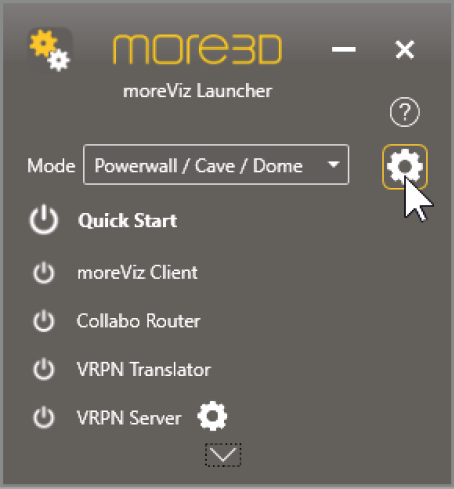
Launch the moreViz Launcher.
Open Settings in the Launcher.
Navigate to the Connection tab.
Set Connection Type to TCP/IP (Auto).
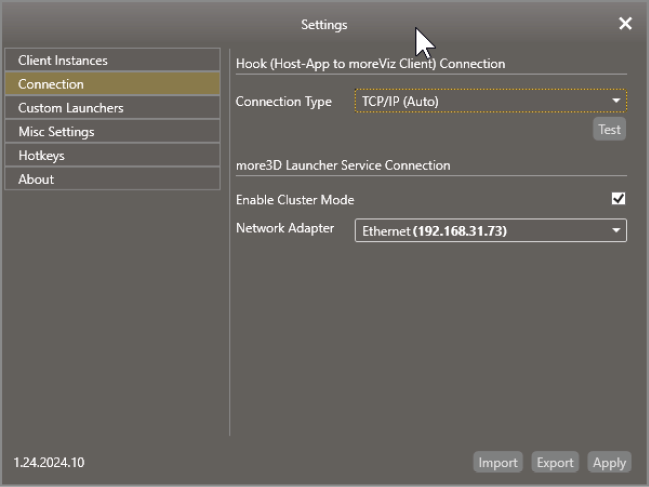
Apply the settings and close the window.
Start the moreViz Client.

Launch the Capture Node.

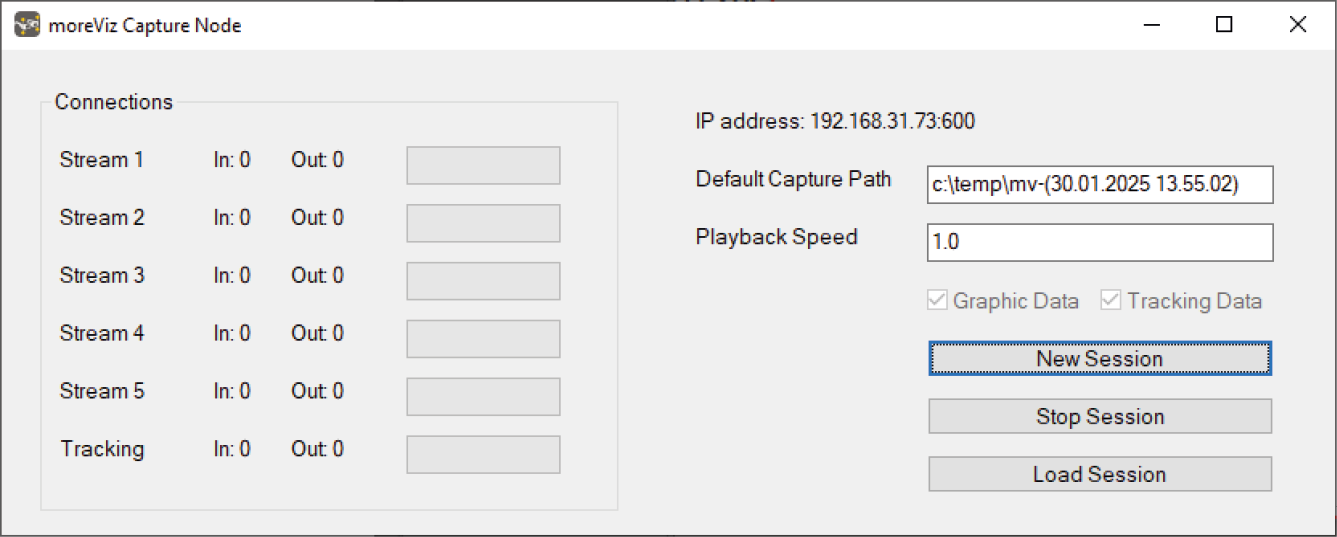
Click New Session.
Start the Host Application.
Load the target 3D model.
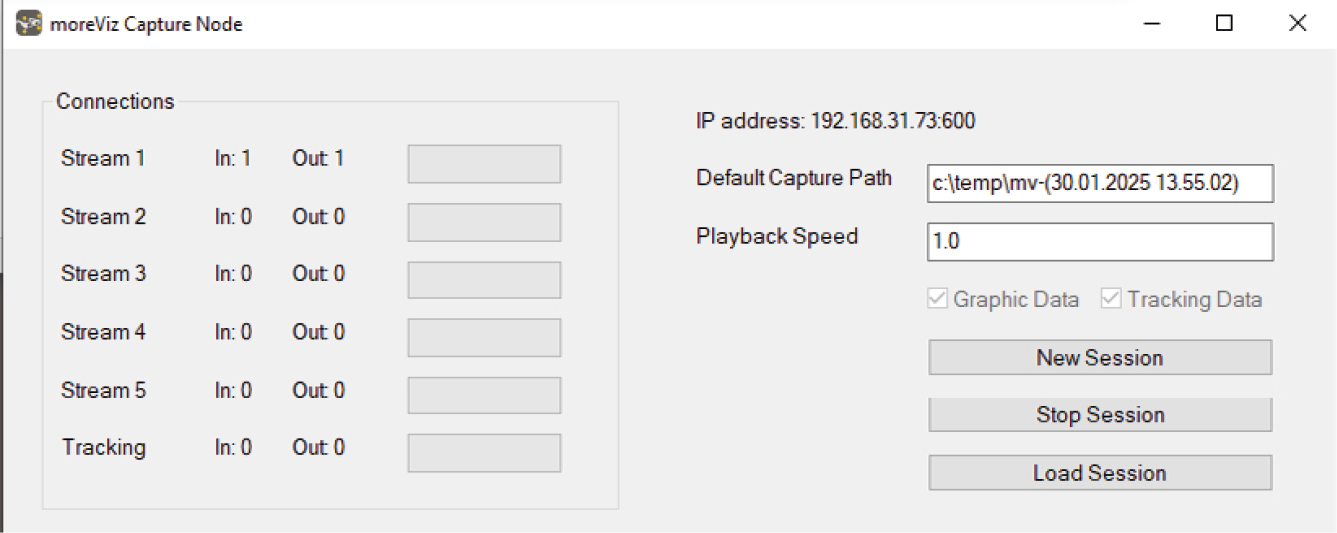
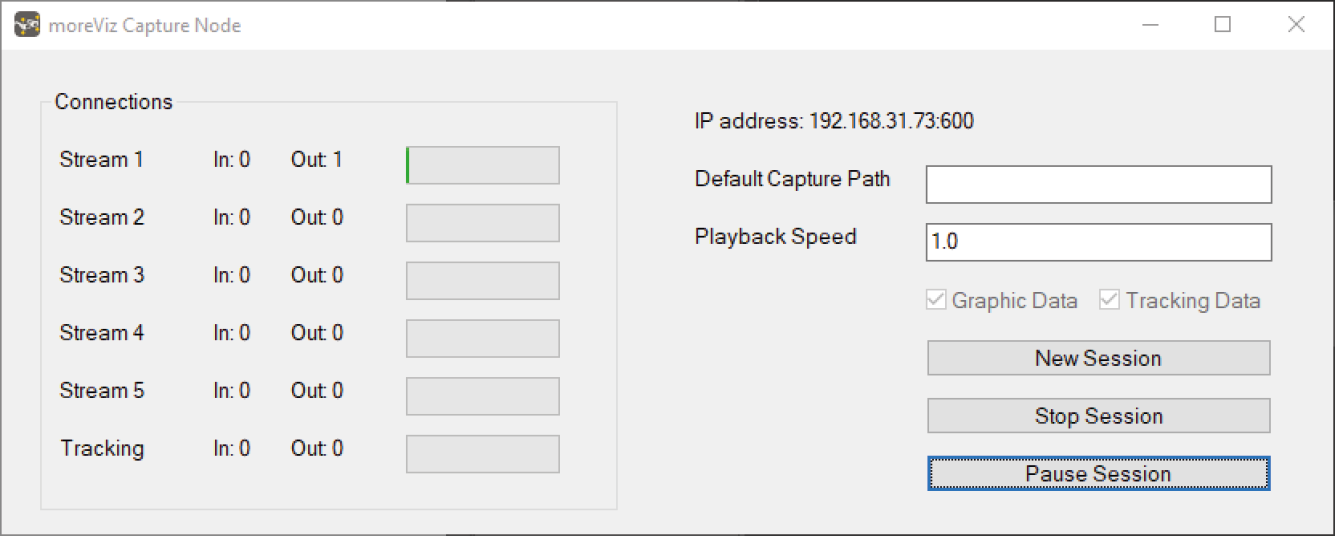
Once the host application sends graphics data to the GPU, the Capture Node will display “In:1” and “Out:1” for Stream 1 (and potentially Streams 2-5), indicating that recording is active.
Click “Fit All” / “Fit Model to Screen” in the host application (if available), or manually zoom into the area of interest.
Exit the Host Application.
Click Stop Session in the Capture Node.
Close the moreViz Client.
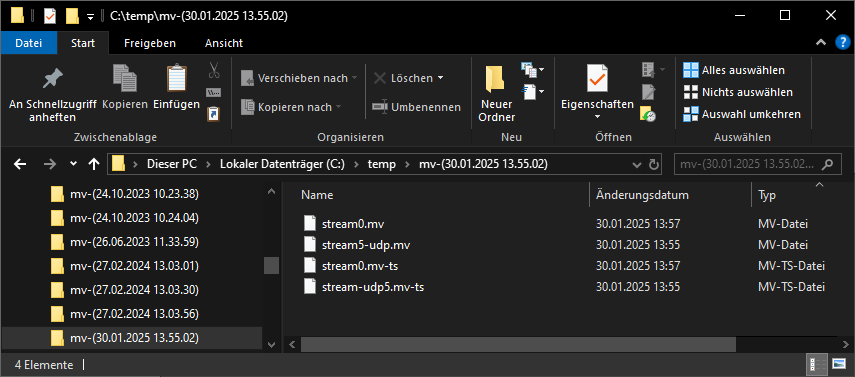
Your session is now recorded and stored in C:\Temp\mv-DATE. This folder contains stream0-5.mv and mv-ts files. In most cases, stream0 holds the relevant data. If needed, compress the folder and send it.
To play back a session:
Start the moreViz Client.
Launch the Capture Node.
Click Load Session and navigate to the recorded folder.
The session will play from start to finish. The last frame remains static, but navigation and interaction within the moreViz Client remain fully functional.


