A few years ago, it sounded like everyone would soon move into the metaverse. That… did not quite happen. At least not in the way some predicted.
What actually happened was something far more practical.
Instead of replacing reality, VR became increasingly useful for understanding reality better,especially in industries and universities dealing with complex spatial information. Engineering, architecture, research, manufacturing, education, and simulation are currently among the strongest adopters.
In other words: less science fiction, more workflow optimization. At the same time, starting with VR can still look overwhelming.
Not because the technology itself is immature anymore. Modern systems are significantly more stable, affordable, and usable than they were even five years ago.
The real challenge is usually planning and implementation.
A surprising number of projects still begin with: “Which headset should we buy?” before having a clear roadmap in place – a sure recipe for failure. Not long thereafter, the expensive equipment turns into a mere dust collector.
This guide focuses on the questions that matter earlier:
- How do you define useful VR use cases?
- Which VR system best fits your environment?
- How much space, budget, and time should you realistically plan for?
- And many practical tips to avoid common pitfalls
Table of Contents
The Right Use Case — Or Why Some VR Projects Fail Long Before the Headset Is Turned On
One of the biggest misconceptions about VR is that success depends mainly on hardware quality. In reality, most problems appear much earlier. Typically somewhere between:
“This looks amazing.” and “Who is actually supposed to maintain and use this?”
VR is not automatically useful. The strongest VR projects usually begin with a very unglamorous question:
“Where do we currently lose time, money, clarity, or efficiency because of miscommunication, misunderstandings, travel, prototyping, or coordination?”
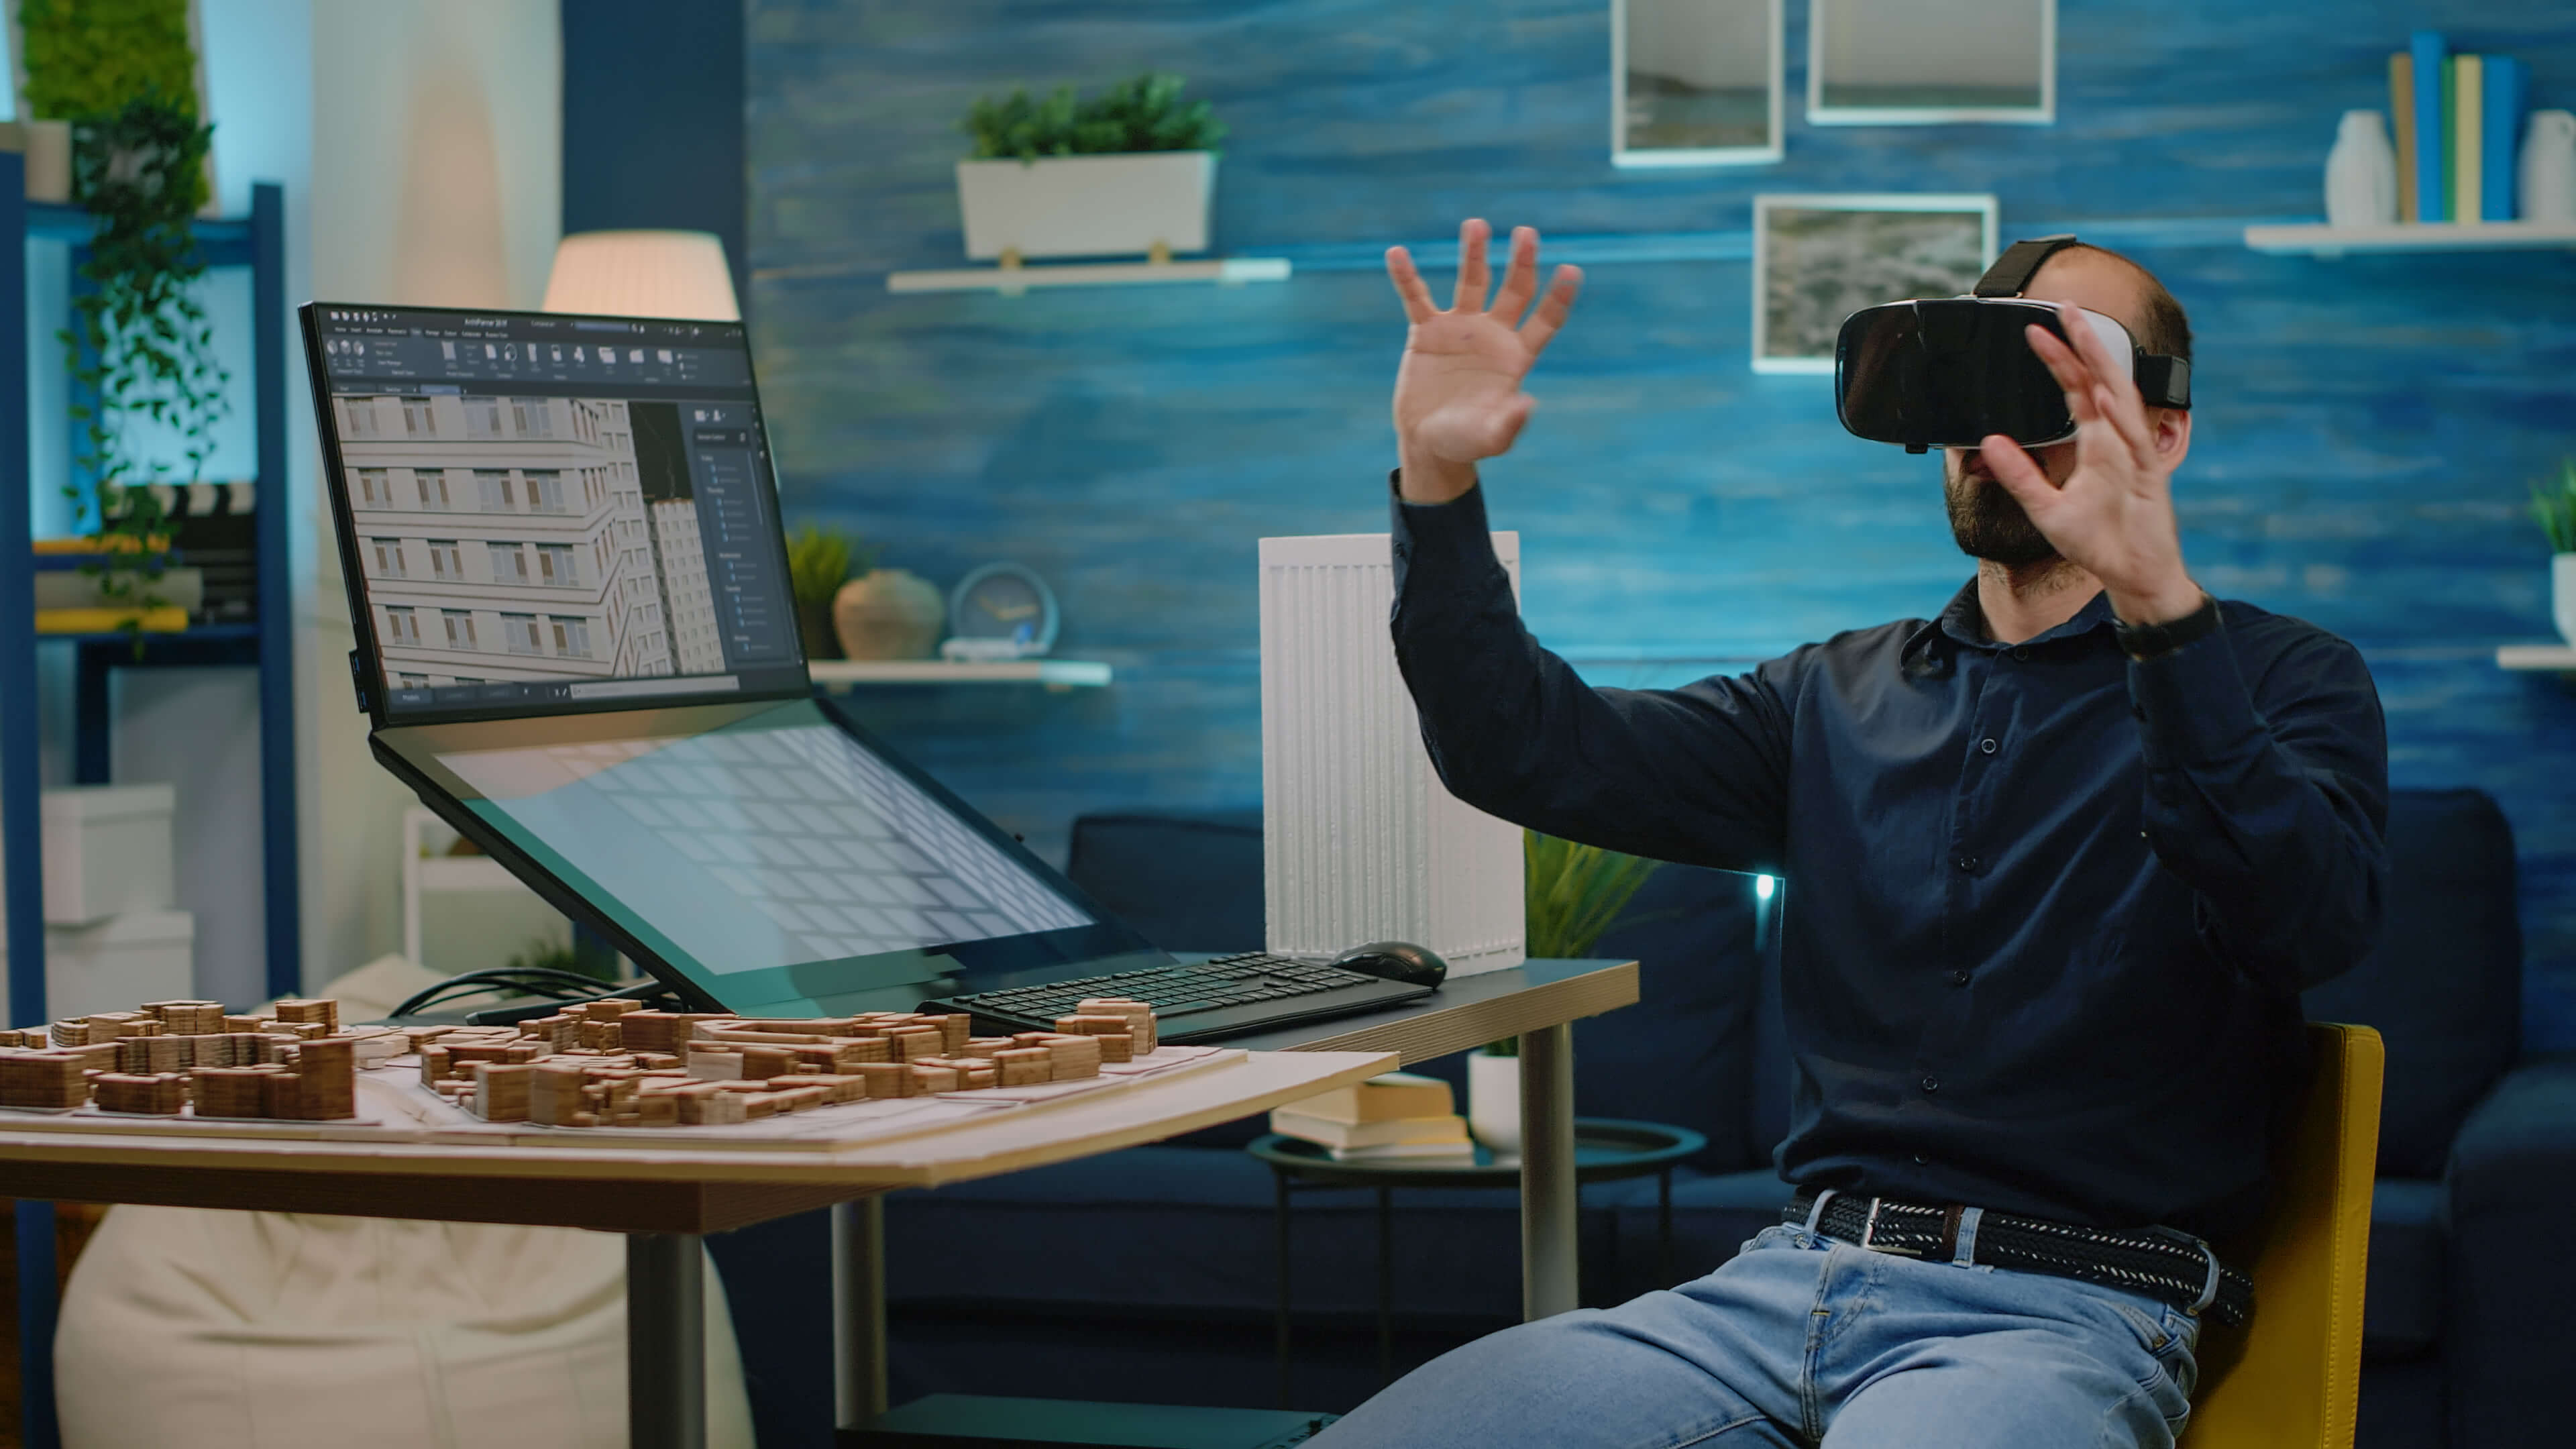
In engineering, for example, many problems are not caused by missing data. The CAD models are precise. The issue is that people interpret complex spatial relationships differently on flat screens.
This is why immersive reviews can be remarkably effective. A layout that looked completely reasonable on a monitor suddenly becomes questionable once somebody stands inside it at true scale.
Questions appear quickly:
- Can maintenance actually access this area?
- Is there enough clearance?
- Can operators work ergonomically?
- Will visibility be blocked here?
These are precisely the kinds of issues that become expensive when discovered late, because the later a problem is discovered, the more expensive it becomes to fix.
But how do you develop strong use cases?
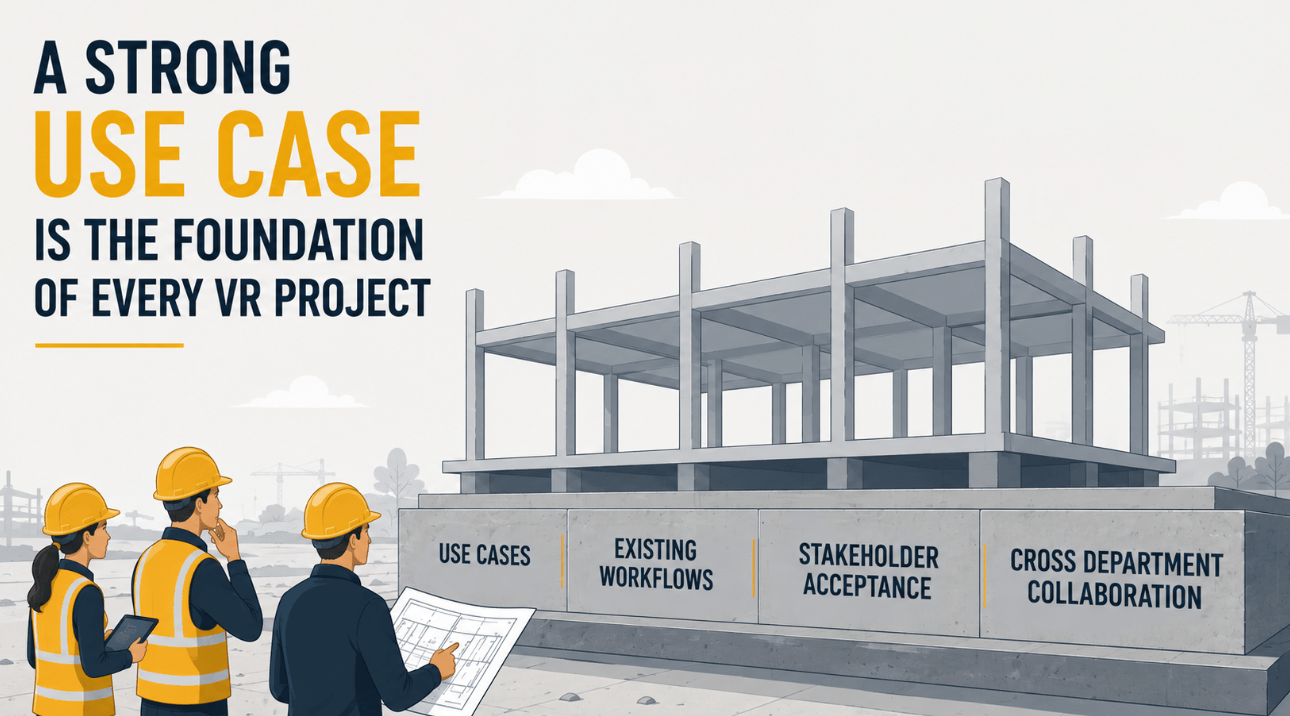
The Best Use Cases Usually Come From Cross-Department Discussions.
One mistake many organizations make is treating VR as purely an IT or innovation topic. The more successful approach is usually broader.
An example: Engineering may care about clearance validation. Production focuses on assembly planning. Sales wants immersive presentations. Human Resources may need realistic training simulations. Management wants faster decision-making between globally distributed teams.
Similarly, in a university, different fields of science, research, and education may have completely different ideas about using VR effectively for visualization and analysis.
A well-organized joint workshop can uncover hidden potential and encourage thinking outside the box. It also helps create broader acceptance for newly introduced technology.
A certain resistance (“Don’t know it, don’t like it, don’t need it.”) is common with new technologies. Involving affected stakeholders early creates a stronger sense of ownership, collaboration, and anticipation.
At the same time, restrictions and challenges can already be identified at an early stage, such as physical limitations, software requirements, or training needs.
A word of caution, however: Whoever wants too much at once will often get lost in details and, in the end, accomplish very little.
While it is good to have a vision of different use cases and document them, it is usually better to begin implementation with only a few — or even just one — and gradually build from there.
This approach allows organizations to grow a sustainable system and process according to available resources, without overwhelming employees or infrastructure. It also creates room to learn from practical experience and lessons learned (See this case study as practical example).
After the initial kickoff and the decision on where to start, regular review meetings can later help identify additional use cases worth implementing.
Practical applications commonly include:
- CAD and design reviews
- factory and logistics planning
- ergonomic validation
- digital twins
- immersive education
- collaborative engineering meetings
- maintenance planning
- safety training
- stakeholder presentations
- simulation environments
- remote collaboration
Especially in recent years, many organizations realized that reviewing complex 3D information over video calls is… not always ideal. Trying to discuss spatial relationships through screen sharing often turns into:
“No, the other pipe.” “Which one?” “The one behind the other one.”
VR can simplify those discussions considerably.
When planning your system, keep it scalable. Your organization’s needs may change, new use cases may emerge, and technology will continue to evolve.
Regarding both hardware and software, it is therefore wise to keep the door open for future extensions and flexibility.
The VR Setup Decision — VR Headset, Powerwall, CAVE, or Better Dome?
Many people still equate VR purely with headsets. But immersive visualization today includes very different system categories, all solving different problems.
And importantly: there is no universally “best” solution.
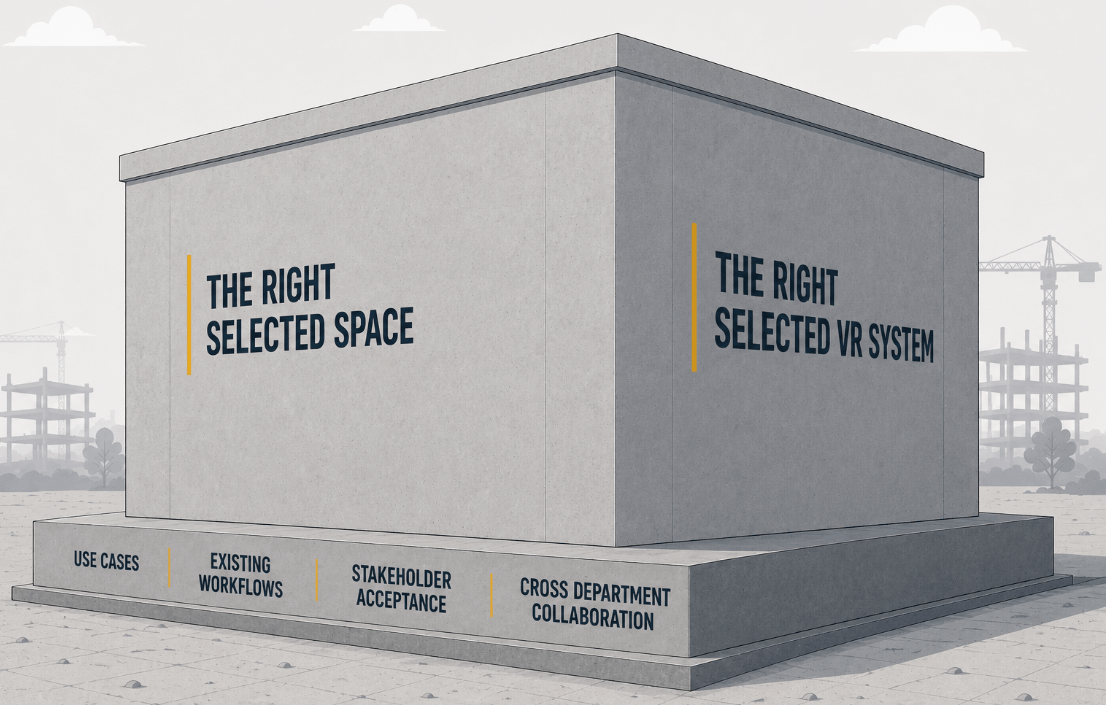
The right choice depends on:
- collaboration style and number of users
- available space
- mobility requirements
- user acceptance
- budget
- visualization goals
The quality of the experience largely depends on high refresh rates and fast response to movement. If you “save money” in the wrong area, participants may experience lagging or drifting environments, potentially causing motion sickness and significantly diminishing immersion. (Read this article to get tipps how to prevent motion sickness).
Responsiveness is typically assessed by the “degrees of freedom” (DoF) that your VR system delivers up to six in total.
More concretely: Does the hardware respond to the participant’s movement in all three spatial directions (up/down, forward/backward, and left/right) combined with the three directions of head rotation, commonly referred to as yaw, pitch, and roll?
It is also important to understand that hardware systems can be combined.
For example, a university or company may use a CAVE where a group reviews a model or simulation together, while additional remote participants join the very same VR session through headsets. (To learn more about VR collaboration, check here.)
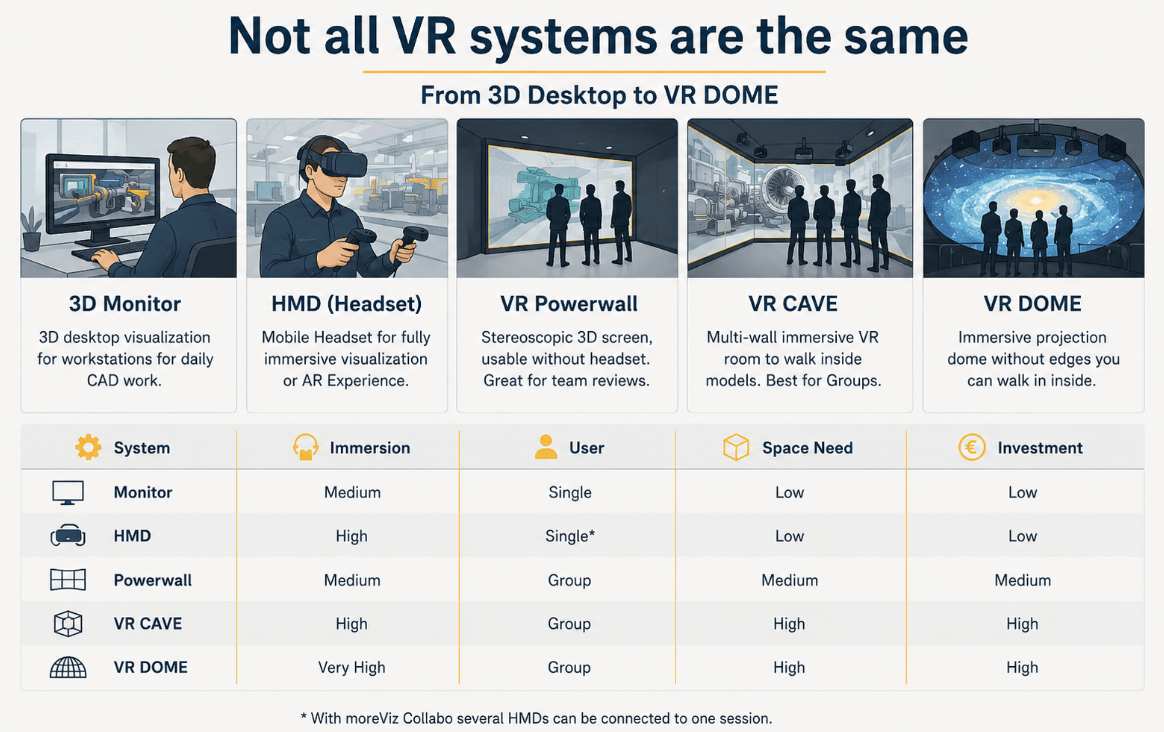
Here is a brief overview of the most commonly used systems, their requirements and specifics.
VR Headsets (HMDs)
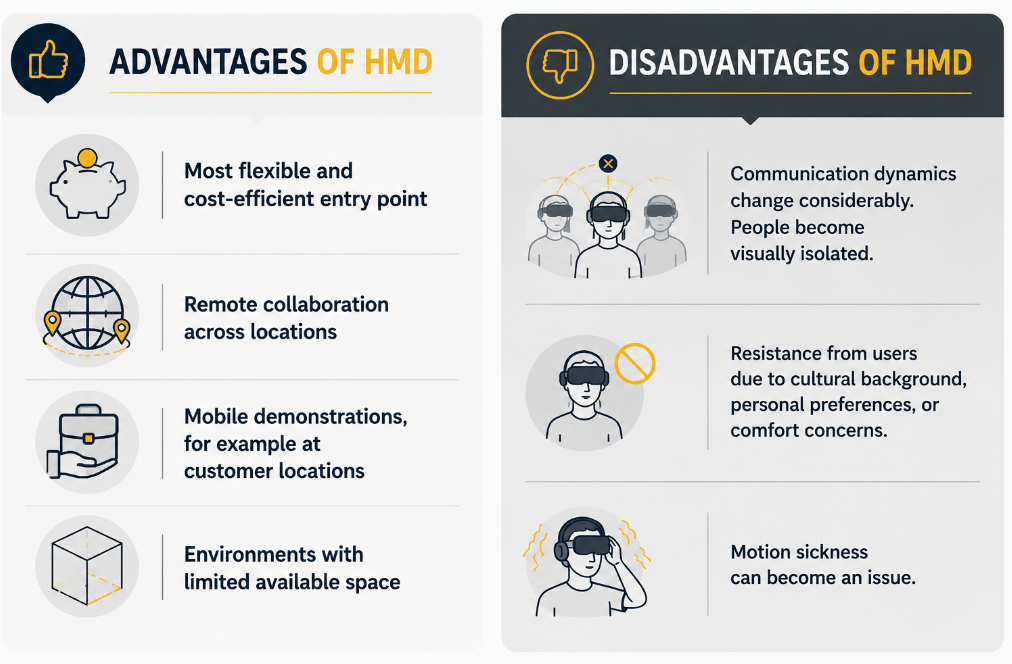
Headsets remain the most flexible and cost-efficient entry point into immersive workflows.
Modern systems such as the Meta Quest 3, Vive Focus Vision, or Varjo XR-4 offer remarkably high visual quality compared to earlier generations.
There are tethered and untethered solutions — wired or wireless connections to a GPU. Given the high amount of data in most professional scenarios for now tethered solutions with cable are recomemdned. Standalone devices also exist, although in professional environments they are often less practical for demanding workflows.
Typical professional headset setups today range roughly from:
- €1,500 – €4,000 for smaller entry systems (The Meta Quest is available for € 400 – 500, in addition a strong GPU is required for professional use)
- €8,000 – €25,000 for professional engineering environments with workstations, software, support, and tracking integration
To get a list of the best available HMDs and their strengths, look at this article: “Best VR Headsets for CAD Workflows.”
Headsets are particularly strong for:
- individual work, reviews, and analysis
- individual training simulations
- remote collaboration across locations
- mobile demonstrations, for example at customer locations
- environments with limited available space
But they also introduce tradeoffs.
The moment multiple users wear headsets in the same room, communication dynamics change considerably. People become visually isolated from each other, which can make collaborative discussions less natural than many initially expect. However functions as passthrough-mode can counteract this as you see your 3D model placed in midst of the real world, allowing you to perceive your enviroment.
There may also be some resistance from users due to cultural background, personal preferences, or comfort concerns. Motion sickness can also become an issue. (How you can prevent motion sickness, read in this article.)
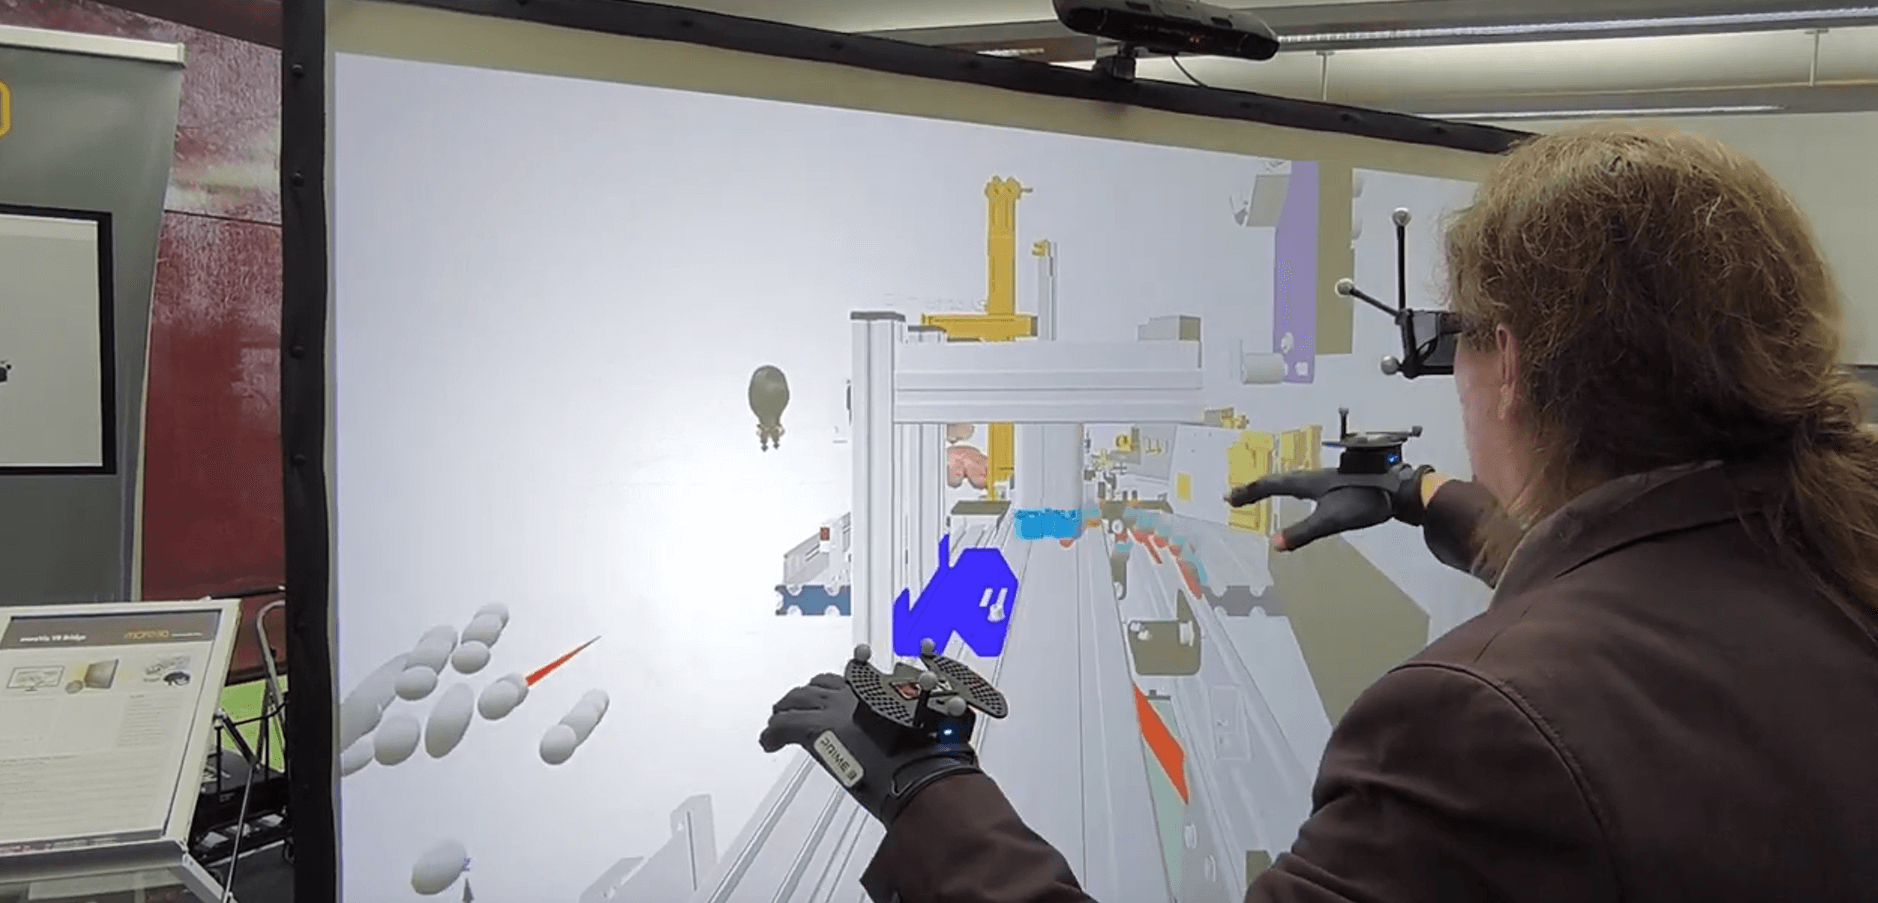
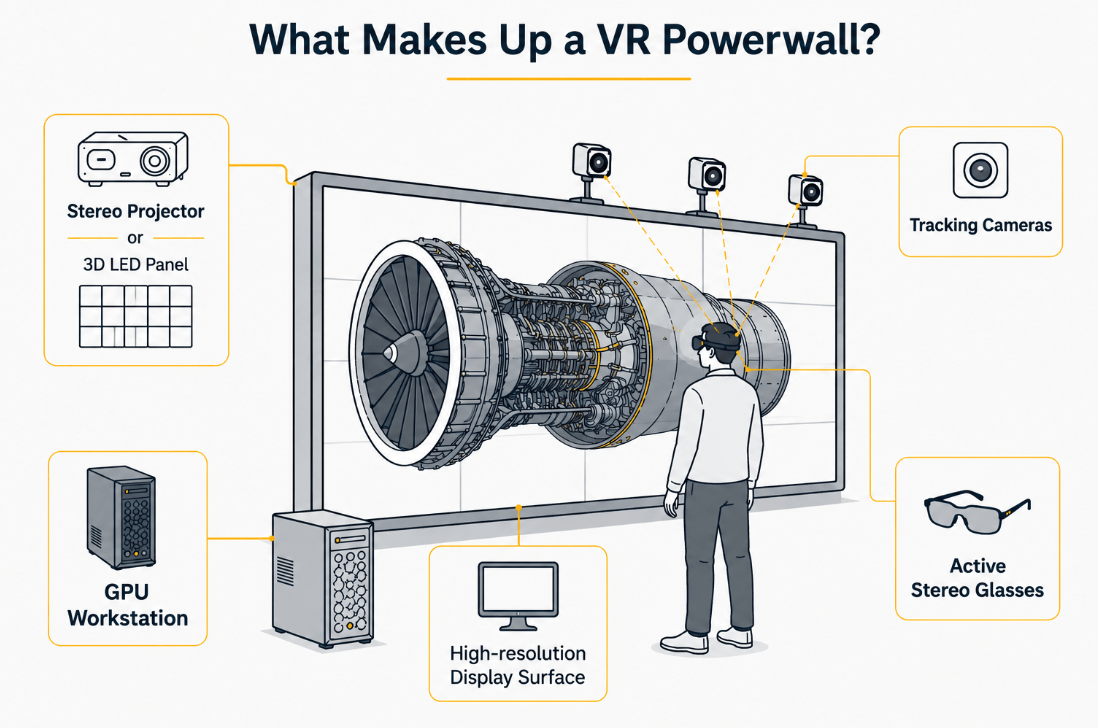
Powerwalls
Powerwalls occupy a very interesting middle ground.
They allow large stereoscopic visualizations without fully isolating users from each other.
For collaborative engineering reviews, this can be extremely practical. Teams can:
- maintain eye contact
- naturally point at areas
- discuss layouts together
- involve stakeholders who may not feel comfortable wearing headsets
Especially for presentations, education, or collaborative design reviews, powerwalls often create a more natural group dynamic than fully individual VR systems.
Integrated Multiviewer Systems such as xCave Technology allow for multiple individual viewports, connecting the pros of HMDs and large scale installation.
A typical Powerwall installation consists of:
- a high-resolution display surface (rear-projection screen or tiled panels)
- one or more stereo-capable projectors or 3D LED panels
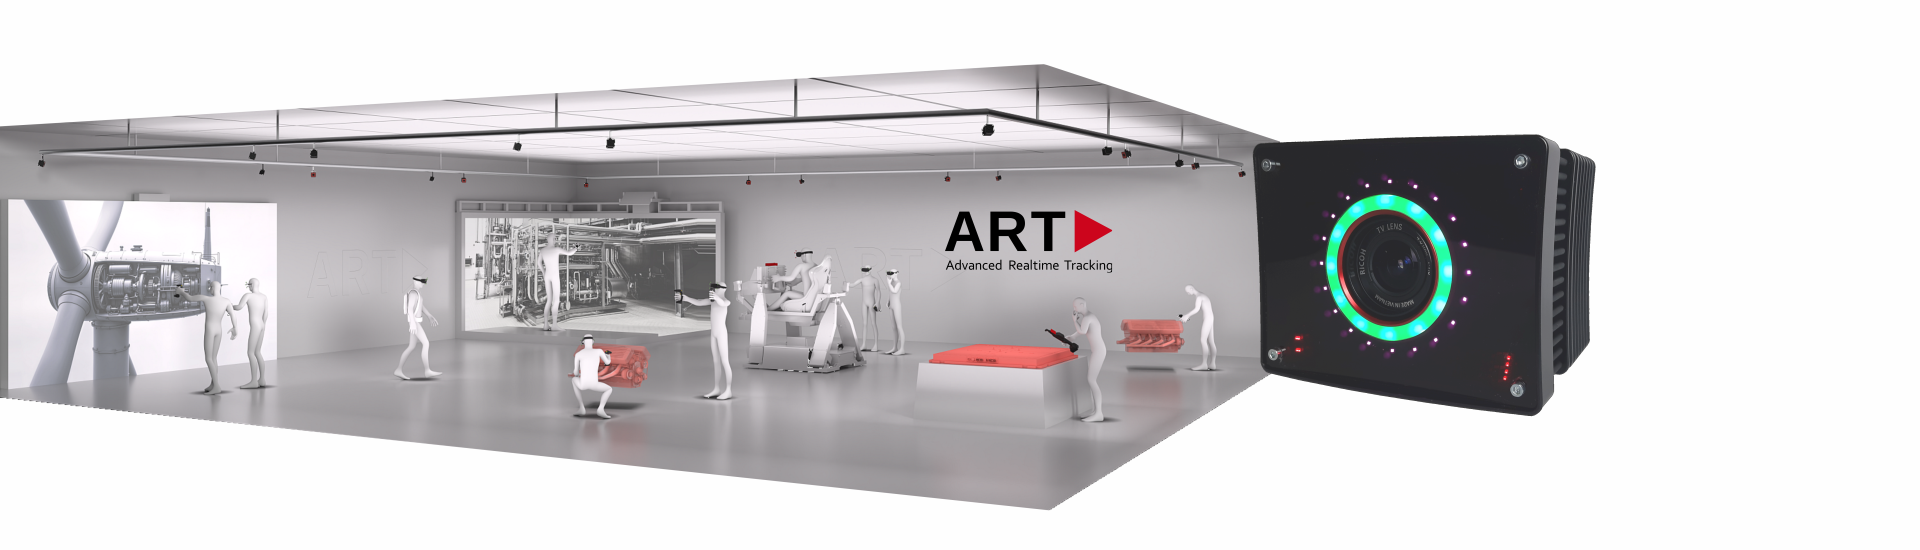
- motion tracking systems (e.g. recommended Advanced Realtime Tracking GmbH & Co. KG and OptiTrack)
- active stereo glasses
- one GPU per display client (recommended)
- Software: moreViz for direct integration with CAD and simulation tools
VR CAVEs
Despite periodic predictions that headsets would replace CAVEs entirely, they remain highly relevant in:
- automotive
- aerospace
- research
- manufacturing
- universities
Their strength is collaborative immersion, communication, and discussion. This can be particularly helpful for group reviews, presentations to customers, as well as VR labs for students and classroom teaching.
CAVEs can be two-, three-, or four-sided — or even fully immersive five-sided systems including floor and ceiling projection.
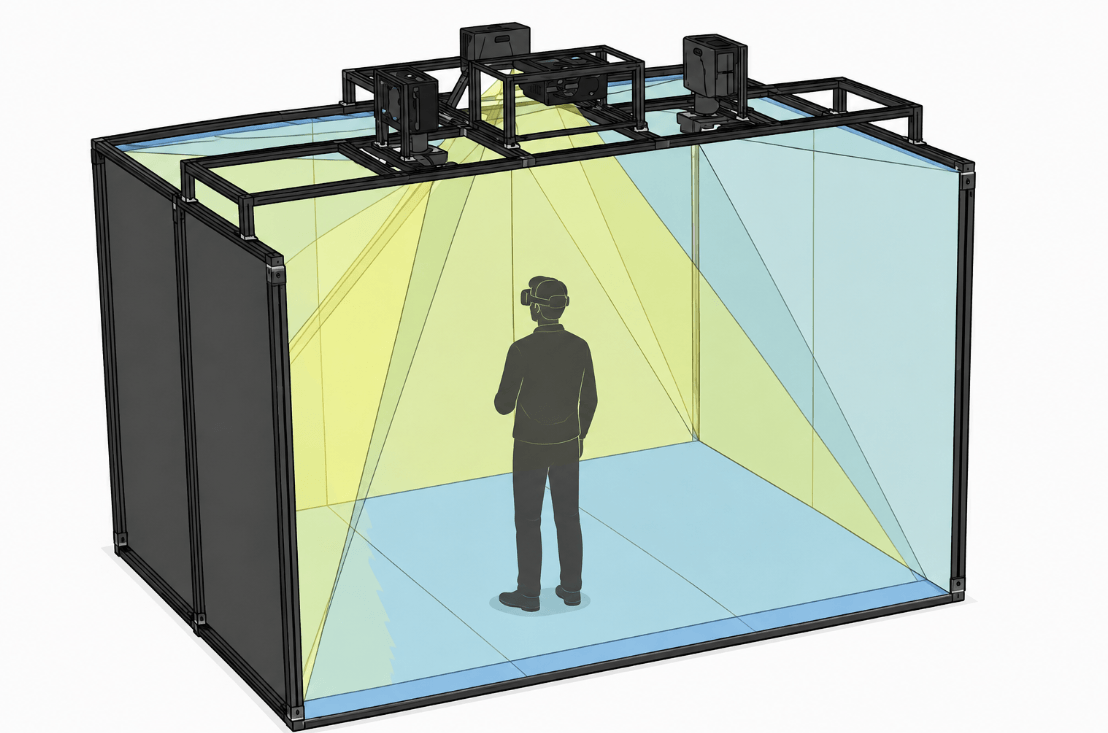
The tradeoff is the needed infrastructure. Traditional CAVE systems typically require:
- dedicated rooms and sufficient space
- advanced projection systems and tracking integration
- ongoing maintenance to remain up to date
How to select a fitting tracking system? Find out more here.
A standard entry-level configuration is a three-sided CAVE with front, floor, and side projection:
- Projectors: 3× WUXGA or 4K laser projectors (6,000–8,000 lumens)
- Tracking system: ART or OptiTrack with 2–4 infrared cameras
- Screens: Rear-projection surfaces, approximately 2.5×2.5 m per wall
- PC: High-end workstation with NVIDIA RTX Pro 4000 Blackwell or similar
- Software: moreViz for direct integration with CAD and simulation tools
- Glasses: Active shutter glasses with RF synchronization
Costs vary enormously depending on complexity. Professional projection systems may start around €50,000 – €100,000 for the hardware, while larger multi-wall immersive environments can extend well into several hundred thousand euros or more.
More here: “Does a VR Cave Make Sense?”
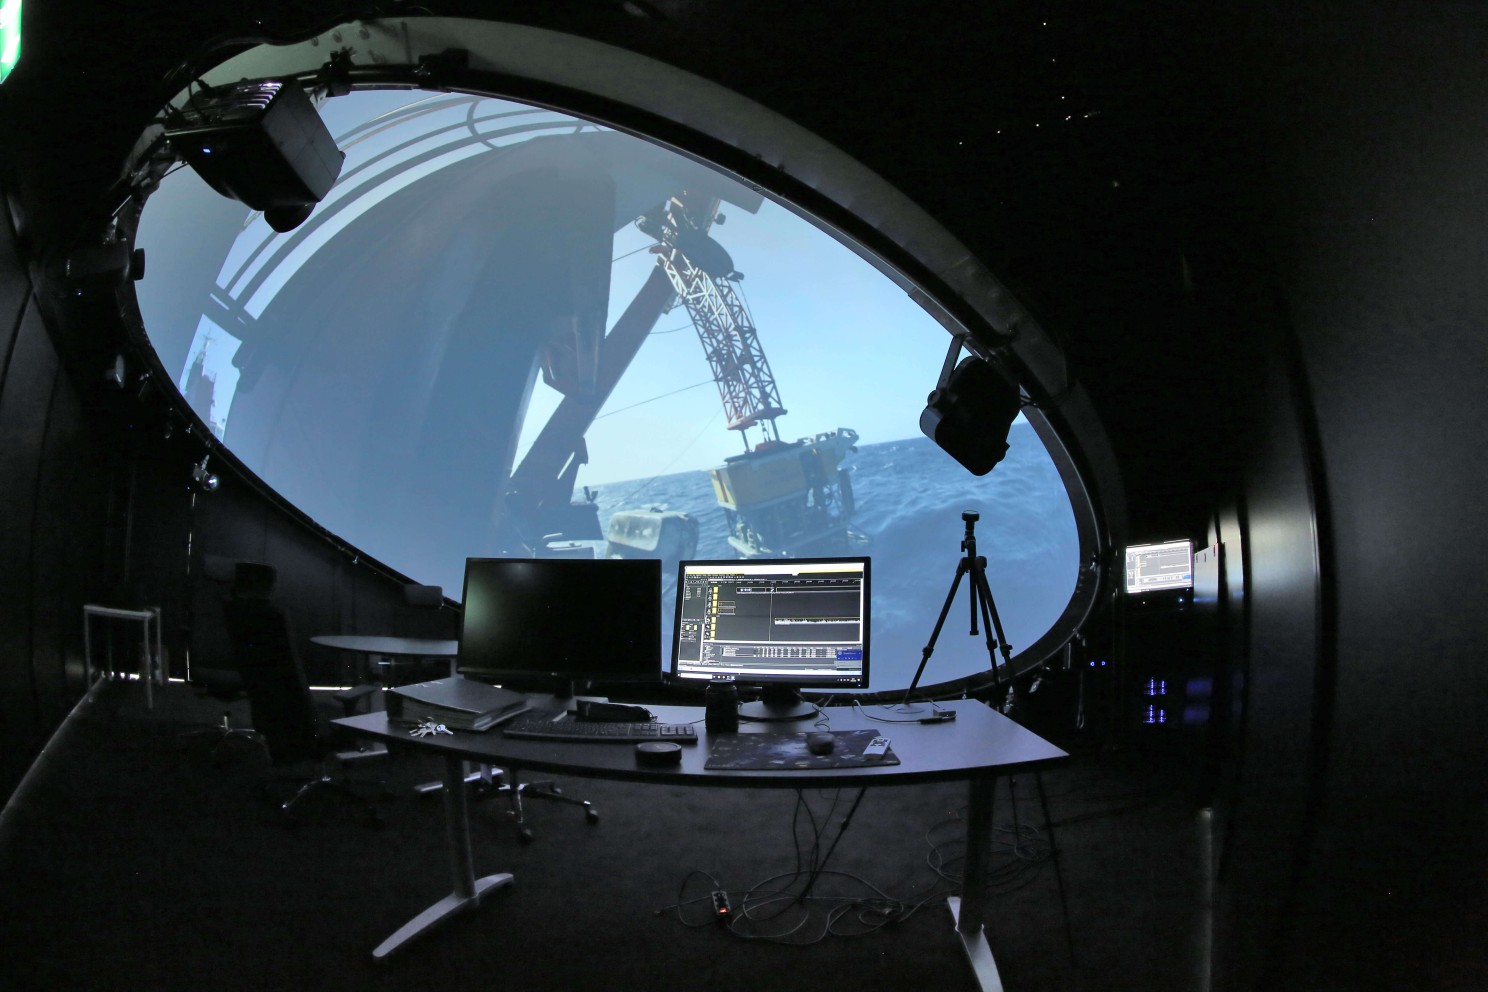
Domes
Domes are often considered the crown of immersive visualization. They are especially valuable for:
- simulation
- museums
- research
- educational environments
- large-scale environmental visualization
Unlike headsets, domes create shared immersive experiences for larger groups simultaneously. And unlike CAVEs, they avoid visible corners or edges. Consequently, the level of immersion can feel extremely natural.
This can be highly effective in teaching environments where entire classes need to experience the same simulation together instead of individually isolated. They are also very valuable for scientific research and exploration. (See here a Case Study of a Dome.)
A typical VR Dome for museums or public installations includes:
- Projectors: 1–6 projectors depending on dome size and resolution
- Calibration: Auto-alignment via VIOSO Anyblend or similar
- Dome size: 4–8 m diameter, inflatable or fixed structure
- Audio: 5.1 or ambisonic sound system for full immersion
- Software: moreViz for direct integration with CAD and simulation tools
Computer — Or the Power Behind Your System
To guarantee good performance, the right graphics cards and CPUs are essential.
Even for headsets in professional environments, we usually recommend one dedicated computer per headset. For a CAVE, the number of computers typically depends on the number of projectors.
Hardware requirements can vary significantly depending on use cases. Most gaming computers meet minimum requirements. However, to give a rough idea of what may be needed, the following examples can help.
Still, we strongly recommend consulting an expert before purchasing expensive hardware.
Basic Computer System for VR
- Quad Core 4× 3.5 GHz or better
- 16 GB RAM or better
- NVIDIA GeForce GTX 4060 or better
- NVIDIA Quadro RTX A4000
- Windows 11
Intermediate Computer System for VR
- 8× 4.5 GHz or better
- 64 GB RAM or better
- NVIDIA GeForce RTX 5080 or better
- NVIDIA Quadro RTX 5000 ADA
- Windows 11
High-End Computer System for VR
- 16× 4.5 GHz
- 128 GB RAM or better
- NVIDIA GeForce RTX 5090
- NVIDIA Quadro RTX PRO 6000 Blackwell
- Windows 11
The Right Spot — Or Why Physical Space Planning Is Often Underestimated
VR discussions often focus heavily on GPUs, resolution and refresh rates before somebody eventually asks: “Where exactly will this system physically go?”
Important considerations include:
- walking space (or whether users will stand or sit)
- ceiling height
- ambient lighting
- projector distances
- cable routing and wiring
- ventilation
- acoustics
- tracking coverage
- user safety
- accessibility
For room-scale VR, safe movement zones are essential. Users naturally move while immersed, which becomes problematic if the environment contains obstacles, narrow walkways, or low ceilings.
The required space can vary greatly depending on use case and number of users.
A typical CAVE may measure around 2 – 2.5 m per wall. A dome itself may have a diameter of 4–8 m.
Consequently, this creates a substantial footprint. However, depending on the physical conditions, a good consultant can often develop flexible and customized solutions.
Projection environments introduce additional infrastructure requirements:
- controlled lighting
- projection surfaces
- maintenance access
- structural considerations
- acoustic management of projector noise
- in some cases climate control may become necessary
Good planning and system selection are essential. If modifications to the room become necessary, these can often become the longest part of the overall project duration depending on third parties, internal processes, and construction requirements.
Depending on future use cases and technological developments, you may later want to upgrade or scale the system. Therefore, it is wise to plan the infrastructure in a scalable way that allows future expansion.
Of course, smaller headset setups may fit relatively easily into existing offices, while larger immersive projection systems often require dedicated planning much earlier in the project timeline.
Which is generally preferable to discovering halfway through deployment that a support beam sits directly where the projection system was supposed to go.
The Key to Successful VR Projects — Or Why Software Integration Matters Most
One of the least glamorous but most important success factors in VR projects is workflow integration.
For a seamless experience, you need to connect your input information — for example your 3D CAD model — with the rendering hardware and the visualization output such as a CAVE, HMD, or Powerwall. Tracking systems must also be integrated properly.
Professional software such as moreViz acts as a VR bridge to combine all these components into one practical workflow without requiring complicated export or conversion processes.
At the same time, flexibility matters. Applications and workflows may evolve over time. For example, moreViz can be customized to support virtually any OpenGL-based software.

If VR becomes complicated to use, adoption drops quickly.
If entering VR requires twenty preparation steps, most users stop somewhere around step eight. Usually permanently.
This is one reason real-time VR bridges are becoming increasingly important: within seconds, users can step directly into VR from their existing applications.
That significantly reduces friction and makes immersive workflows practical for daily use. Learn here more about about the VR bridge moreViz.
Budget and Timeline — The Less Glamorous But Very Important Part
The good news: entry into VR is far cheaper today than many organizations assume. However: professional immersive environments still require realistic planning.
Ranges are approximate and vary by configuration. The following figures provide only rough orientation:
System | Budget Range | What’s Included |
Minimum system, DIY style for one user | €1,500–€2,500 | Gaming PC, consumer VR headset, open-source software |
Professional VR headset setup for one user | €9,000–€20,000 | GPU workstation, VR HMD, VR bridge |
Professional VR headset setup for multiple users | €20,000–€50,000+ | Two computers, two HMDs, VR bridge, collaboration software |
Projection VR (e.g. Powerwall) | €60,000–€100,000 | Fully integrated system with software |
Projection VR (e.g. CAVE or Dome) | €80,000–€250,000+ | Fully integrated immersive environment |
Beyond hardware and software costs, organizations should also budget for:
- preparation of suitable facilities
- integration and setup
- training
- support and maintenance
- content development
And importantly: internal ownership.
Many successful VR projects have one thing in common: somebody internally is clearly responsible for driving and maintaining the system.
Several universities and research institutions reported that assigning dedicated VR coordinators dramatically improved adoption and ongoing usage. Which makes sense. Somebody eventually needs to:
- manage updates
- support and onboard new users
- coordinate workflows
- troubleshoot issues
These personnel costs may vary depending on the organization. In many cases, maintenance or support contracts make sense to ensure longevity and protect the investment.
When it comes to timelines, these can vary greatly depending on organizational structure, procurement requirements, regulations, and construction work. If a room needs to be built or significantly renovated, this usually becomes the longest phase.
The actual VR setup of a CAVE or a VR lab with several HMDs and a PC cluster is often completed within a single day once the infrastructure is ready.
If the system is well designed, training requirements are usually not extensive. Many users can learn to operate modern VR systems comfortably within 15 – 30 minutes.
Typical Timelines From Planning to Implementation
- Simple Headset Setup: 1–2 months
- Professional Engineering Deployment: 2–6 months
- Large Multi-User or Projection Systems: 6–18 months
Final Thoughts on setting up VR in 2026
VR in 2026 is no longer experimental technology. But successful implementation still depends far more on workflow design and planning than on marketing hype.
Here again are the most important steps:
- Collaborate to define practical use cases, project requirements, budgets, and time restrictions.
- Plan the VR system (Headset, Powerwall, CAVE, Dome), including tracking systems and computer hardware.
- Plan the available physical space carefully.
- Plan the software needed as VR bridge and collaboration platform.
- Plan for training, support, and mainte

When doing this, consider the following common errors and lessons learned:
- Assign clear ownership for implementation, usage, and maintenance.
- Involve different departments early to increase acceptance and develop practical use cases.
- Start small and grow gradually.
- Keep usability as high as possible to reduce barriers to usage.
- Visual qualities such as framerates are important — but not everything. Consider the entire workflow and how all system components work together, including software integration.
Find more lessons learned here.
And importantly: choose systems based on actual workflow requirements rather than assumptions. Sometimes the right solution is a headset. Sometimes a Powerwall. Sometimes a CAVE. Sometimes a dome.
And sometimes the correct answer is: “We should first define the workflow before buying anything.”
And that makes something else clear: the value of a reliable and experienced partner.
Professional VR projects are rarely off-the-shelf solutions. Requirements, workflows, physical conditions, and users vary too much.
A good VR partner helps create the right system: not overdesigned and overpriced. But also not undersized and later underused.
Want to know more? Feel free to contact us for a free consultation.